WordPress Add Pages
WordPress started out as simple blogging tool which only allowed write posts in a website, there were no concept of pages. In the year 2005, Pages were introduced in WordPress version 1.5 to allow users to create static pages.
For example, a contact page, a home page, a legal info page, etc. Even though pages are supposed to have static content, but that does not mean users can not update them, it can be updated whenever as per the user's need.
Now when you are familiar with pages let's see how you can add them in your website -
Adding pages is similar to adding posts in WordPress. Pages are static content and often do not change its displayed information.
Following are the simple steps to add pages in WordPress.
Step 1 : − Click on Pages → Add New as shown in the following
screenshot.

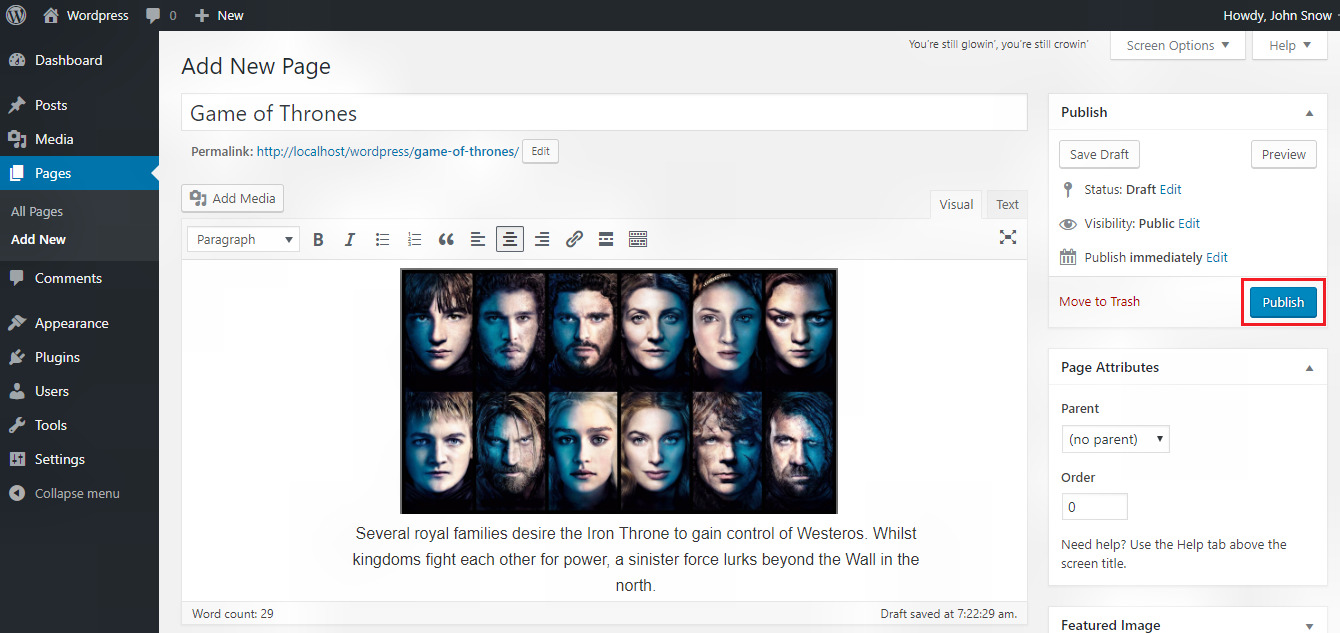
Step 2 : − You will get the editor page as seen in the following screenshot.
The editor page has two tabs, Visual and Text(Using HTML tags). You can insert text in either of these. Here, we'll study about inserting text into Visual format.

Following are the details of the fields on editor page of the Add New Page.
Title
Here you have to enter the title of the article, which will be displayed on the page.
Permalink
It shows the potential URL for the page. It depends on the title of the page.
WYSIWYG Editor
In WYSIWYG Editor, you can create and edit the content of the page. It is similar to a word processor interface.
Publish
Here you will find options to publish or to save the page to drafts. You can also see the preview the page from here to have a look at how your page will get displayed on the website.
Page Attribute
Page attributes segment gives you options to select the parent page(if any) for your particular page. You can also set order of the pages, so that wordpress will know which page to display first. Page with lower order get displayed first.
- Parent: Allows you to select parent page.
- Order: Sets the order of the page.
Featured Images
It allows you to include images in the pages.
Step 3 : − After finishing adding content in the page, click on Publish button as shown in the
following screen. After clicking on publish, your posts will get publish on the website.

In the next tutorial we will see how to manage the pages which you have created in your website. You will find steps to edit the pages and also to delete them if you don't need them anymore.